(This article talks about using a lighter to help with some steps for shoelace aglet replacement. Always use safety procedures around lighters. The mention of the use of lighters is intended for adults only.)
I have had several shoelace tips break and fray. You end up with one nice-looking lace end and one that looks like an eyesore. There are several solutions I have tried and non of them have made the lace tips look perfect again.
To replace or repair your shoelace tips you need to have new aglets (shoelace tips) or materials to make the shoelace end repairs. There are several ways to get them either looking new again or at least functions. You can use items at your home or shop for new aglets to replace your damaged shoelace tips.
Here are 5 common methods to repair your shoelace aglets:
- Use glue and thread to create a stiff aglet-like shoelace end.
- Use scotch tape to wrap your shoelace end.
- Use glue to stiffen the end of the shoelace.
- Use wax to stiffen the end of the shoelace
- Use a knot for style and to prevent the shoelace end from slipping through the eyelet.
When I repaired my pair of shoelaces, I used clear tape to roll around the end of the shoelace. Then I cut off and extra material at the end. I was happy with the results because it almost looked normal again and it could go through the shoe eyelets easily.
Getting New Aglets / Shoelace Tips

The plastic or metal ends of shoelaces are called aglets. “Aglets were originally made of metal, glass, or stone,[4] and many were very ornamental. Wealthy people in the Roman era would have their aglets made out of precious metals such as brass or silver.” (wikipedia.org)
If you have lost the plastic end of your shoelace you may want to replace it with a new one. Sometimes my shoelace tip starts to break apart and get damaged. My shoes look good but not my shoelace ends.
One of the easiest ways to get your shoe looking nice again is to replace the plastic tip or aglet on the end of the shoelace. There are various products you can use to replace them, but my personal favorite is heat shrink tubing.
Almost all my shoes have clear aglets (shoelace tips). If I need to replace the clear tip I can use heat shrink tubing to get them looking nice again. You can find tubing that will fit most standard-size shoelaces and if you need various colors you might be able to find those as well.
General Steps to Replace Aglets / Shoelace Tips

- Remove the old aglet. They may be difficult to remove because they are usually attached to the shoelace fibers. A pair of needle-nose plyers or tweezers might help.
- If you are having trouble removing the old aglets after a couple of minutes, consider cutting the shoelace just before the aglet if you have enough shoelace length available.
- Prepare the shoelace ends. If the ends are frayed and fluffy, you can moisten them a bit to see if they will stick together and insert them into the new aglet.
- If this is not possible, you might want to cut the shoelace end a little so it can fit.
- You can also use a small bit of Elmer’s glue to stick the fiber together. Be careful with any quick-drying glue and use a brush instead of your fingers.
- Caution. If the end is the right size except for the very end, some people use a lighter to singe the ends. I would use a long-reach lighter to singe the end of the shoelace quickly. I would do it over the sink so water is available if needed. (Don’t use a regular lighter. The lace tip could melt and drip into the flame and cause the lighter to explode.)
- Measure your shoelace width if needed. When getting a new aglet, you may need to find out the width of your shoelace end. Some aglets only fit on certain widths. Using a ruler with millimeters should work to find the size for most aglets.
- Place the aglet over the lace end. The simplest aglet would be a heat shrink tube. Just cut the tube to the length you want and place it over the shoelace end. Then use a hairdryer to shrink the tube over the shoelace end.
- There are lots of other options for aglets to use. Choose one that interests you the most and be careful to get the one that fits your shoelace exactly. Many shoelaces are about the same size but sizes can vary greatly.
- Cut the aglet end if needed. Once both aglets are on, check to see if the laces have extra fibers sticking out and if the aglets are the same length. Cut them to match each other if needed.
As mentioned before you can find many types of aglet to use on your shoelace ends. Below are some of the aglets that I would recommend trying. They all have their pluses and minuses, so choose the one that best meets your needs.
Heat Shrink Tubes
These are a fairly easy and nice-looking option if you want an aglet that is clear (like most of the ones on my shoes) or if you want to customize your laces with various colors.
Just cut the tube to size, place it over the shoelace end, and heat it until it shrinks over the end.


Metal Crimp-On Aglet
These are good choices for large households or possibly a school. The crimp onto the end of a shoelace.
You can get a tool to crimp them, but I imagine a regular pair of plyers could do the job.


Metal Screw On Aglet
These should be fairly easy to use because you just place the lace inside and place a screw in the aglet to hold the shoelace in place.
These come in many colors so you can customize your laces.


Repair the Aglet / Shoelace End
If you are looking for an alternative to buying an aglet, you can use one of the following methods to help you get your shoelace ends looking better and able to go through the eyelets of your shoe.
Most of the methods you may be able to do without buying any accessories because many people have these supplies at home. If you’re not worried too much about looks but want your shoelaces to function, try one of the following methods.
1. Glue and Thread Method

- Remove the old aglet if needed. Sometimes, an Exacto knife can help you remove stubborn aglets. Use your plyers or tweezer to ensure your fingers are safe. Cutting on a safe surface will also help prevent cutting into the surface of where you are working.
- Measure and Tie the thread onto the lace end. Measure about one inch from the lace end and tie your thread around the shoelace.
- The thread can be a plastic line or a regular thread.
- Wrap the shoelace end. Start wrapping the thread around the shoelace, moving toward the end. Near the end tie off the thread.
- Wrap it as neatly as possible for a clean look.
- Cut the shoelace end. Some fibers will be left sticking out from the wrapped end. You can then cut off the remaining fibers past the wrap.
- Use glue on the length of the wrap to create a long-lasting aglet.
- You can also try singeing the fibers at the end. Depending on the type of shoelace you have, it will shrink into a rounded end. (Be careful when using any lighter to singe fibers. Using a long-reach lighter can be safer.)
- Check the wrap/aglet for loose fibers. There may be loose fibers or thread that needs to be glued down, cut, or singed.
- Remove any loose fibers and thread or glue down for a smooth, even look.
I learned about this method from instructables.com. Click the link to learn more about this method.
If your plastic aglet is stuck on your shoe very well, I recommend using an Exacto knife to carefully cut it open.
Using a cutting pad will ensure you don’t get your workbench or table damaged if you are cutting any part of the shoelace or aglet with an Exacto knife.

2. Scotch Tape Method

- Remove the old aglet if needed and measure about an inch of tape about the width of the previous aglet.
- The type of tape you use can make a big difference. If you have clear thick tape this should work better.
- Place the tape under the shoelace end. The end of the tape should be placed under the shoelace end sticky side up.
- Roll the shoelace end forward. The shoelace should roll forward as the tape wraps around it.
- For a tight wrap, use a hard surface to roll on and align the tape well before rolling.
- Check the wrap. The tap should stick fairly well to the fibers of the shoelace end. If you were able to make a tight wrap the end should be fairly tight as well.
- If it looks wonky, you can always take the tape off and try again.
- Cut the end off if needed. It might be a good idea to cut the end of the tape roll (aglet) to get a clean sharp edge. First, wrap both ends and compare them. Then, cut the tips so they look the same.
I have used this method a couple of times when I needed a quick fix for my shoelaces. It works really well with the completely transparent tape that is thicker than the normal kind. (Picture – A fast wrap. Could look much better)

3. Glue Method

- Remove the old aglet.
- It’s OK to cut off the aglet if you have plenty of shoelace length. Just be sure you can use the shoelace the way you intend to.
- See what glues are available to use at your house. You’ll need glue that hardens enough to help the shoelace end go through your shoe eyelets. Glues can work well but can also get messy if care is not taken.
- Papercraft glue will help the shoelace ends stick together but it lacks the rigidity that other glues have.
- Hot glue gun glue can work well to harden the end of a shoelace, but you need to find an effective method of application that looks acceptable and can cover the shoelace end. Be careful that the shoelace end isn’t too wide to fit through the shoe eyelets.
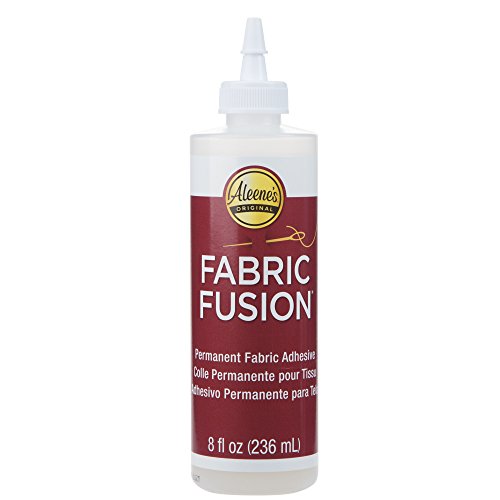
- Fabric glue can work well to create a rubbery texture around the end of the shoelace. Apply enough but not too much.
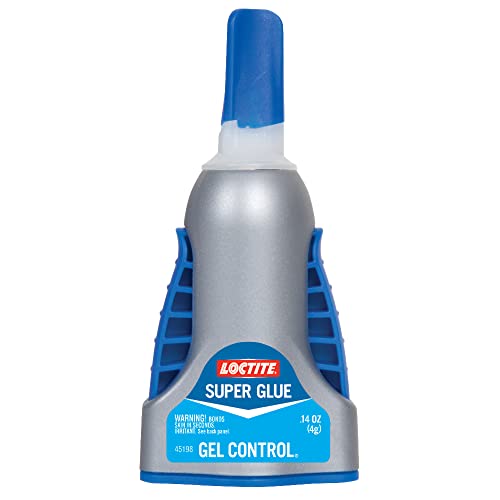
- Super glue is an effective method to harden your shoelace ends. A Q-tip or craft paintbrush can be used to brush it on. If your shoelace end is very frayed you can carefully apply glue between the fibers to get them to stick together.
- Apply the glue to the shoelace end. You’ll want to be careful handling some glues and use them in a well-ventilated area. Try to apply the glue by brushing it on, dipping it or rolling it on, and then brushing it smooth, or using rubber glues to help apply and smooth the glue.
- Roll, brush or use gloves to shape the shoelace into a smooth round shape. The shoelace should look straight and smooth with all the fibers tight together.
- This may be difficult to achieve with some glues. Practicing on another shoelace or string can help you find an effective method.
- Let the shoelace dry. Raise the shoelace above the surface of your work area so the shoelace end can dry without sticking to the surface. You may need to wait for 24hrs to allow some glues to cure before they’re completely dry.
- Cut off the tip if needed after the shoelace end is dry. Sometimes the tip just wants to flare out even after applying glue.
If you need glue, below are some options you might want to consider if you can’t find something that works well at your house. You may also want to consider nail polish. (Amazon.com Link)

4. Wax Method

- Remove the old aglet.
- See if you have a white candle at your house. Any color candle can work but if it’s different than the color of your shoelace it may change the color of your shoelace ends.
- Burn the candle and drip the wax onto a work area. You’ll want to carefully dip the shoelace end into the wax and roll the shoelace end to cover the entire end.
- Let the wax soak in and dry. The wax should soak into the fibers and starts to dry. Remove the shoelace end from the wax once it starts to look like it’s drying.
- Shape the Wax into a round smooth shape. Make sure the wax is not hot and is starting to dry and rolling the end on the work surface or carefully use your fingers to shape it.
5. Knot Method

If non of the above solutions are available and you need an immediate solution you can also just tie a knot on the end of your shoe. This will help the shoelace end look nicer and prevent it from accidentally going through the eyelet.
I never worried too much about my own shoelace ends much unless they refuse to go through an eyelet. Yet, shoelaces can bring style and a new fresh look to your old shoes. Having nice shoelaces makes a big difference when trying to give a good first impression or a job interview.
Conclusion
A shoelace aglet is helpful for the appearance of your shoelaces and how they function. Finding the best solution for your aglet needs will help restore your shoes closer to the way they were when you bought them.
Which of the methods do you think would be best for you? I would like to try the heat shrinks tubes the next time I need a shoelace aglet to be replaced. Thanks for visiting Helpshoe.com
References
https://www.fieggen.com/shoelace/agletrepair.htm