When I grew up, I had several bikes that I used to have fun with and get around the neighborhood. I typically used a double-hand pump with a base to stand on. I learned how to pump up my tires when they were low on air.
To pump up your bike tire, you need an air pump compatible with your bike tire valve (Schrader, Dunlop, or Presta). Attach the air pump head (it usually has a locking switch) and begin pumping. You can use one of the following.
Bike Pump Options
| 1. Floor Pump Amazon Link It can attach to Presta, Dunlop, and Schrader valves, has a gauge, and pumps bike tires fairly quickly. |
| 2. Foot Pump Amazon Link It can attach to Schrader valves, has a gauge, and pumps bike tires fairly quickly. |
| 3. Mini Bike Pump Amazon Link It can attach to Presta and Schrader valves, has no gauge, and pumps bike tires slowly. |
| 4. CO2 Pump Amazon Link This pump is designed to attach to Schrader valves and can quickly inflate bike tires. It doesn’t have a gauge. |
| 5. Electric Pump Amazon Link It can attach to Schrader valves, has a digital gauge, and quickly pumps bike tires. |
| 6. Compressor Pump Amazon Link It can attach to Schrader valves, has an auto gauge, and the ability to quickly inflate bike tires. |
Pumping your bike will be easier after you are able to attach the pump head correctly. Some valves need to be adjusted first before pumping, so check which valve you have and if you need to adjust the value before you pump.
Learning to pump your bike tires correctly and efficiently will help ensure you have a safe and comfortable ride.
Learning the skill of replacing your tire tube and pumping it up to the correct pressure will be helpful when your next flat tire occurs. Having a good pump for your situation can make a big difference. Which bike pump works best for you?
Table of Contents
How to Pump Bike Tire
As mentioned earlier, pumping up your tire to the optimum pressure is important, especially for off-road riders and on-road racers. It helps you stay safe, ride comfortably, and ride with more efficiency.
Make sure to check out the side of your bike tire to find the correct pressure. Check this website for more information about tire pressure.
1. Get the Right Bike Pump
This is an easy mistake to make. You get a bike pump that doesn’t fit your bike tire valve type.
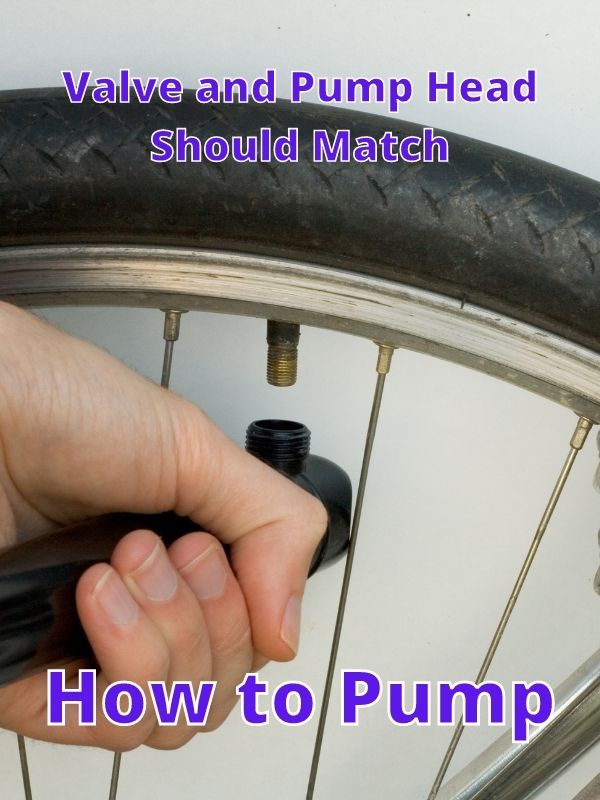
Take a look at your valve and match it to the valve type the bike pump is used for. For example, make sure if you have a Presta valve that your pump head is compatible with a Presta valve type.
If your bike pump and valve type aren’t compatible, you may be able to get an adapter for a different valve type.
Last, get a good-quality pump. Cheaper pumps don’t last long, and are harder to get an airtight seal when pumping, so consider spending a few more bucks for something that’s more solid.
2. Get the Valve Ready
First, remove the valve cap if needed. They usually unscrew the same way you might unscrew the lid off a water bottle.
3. Find Out What Tire Pressure You Should Have
It’s important to know what tire pressure you’re looking to achieve before pumping up the tire – this will give you an accurate target to aim for and prevent you from pumping it up too much. Damage to either the inner tube, the tire, or a blowout could occur with too much pressure.
The desired tire pressure is usually shown on the external tire wall. Find the PSI rating, and this will give you an indication of the correct pressure. If you can’t locate this, look online for what other people have said about the type of bike tire you have.
4. Attach the Pump
For dual-hole openings, pump heads check your pump guidebook for which hole to use for each type of hole. Typically, use the big hole for Schrader valves and the small hole for Presta and Dunlop valves.
First, place the pump head on your valve and apply inward pressure. You may start to hear air escaping.
Second, lock the pump head in place with the switch (or screw) to prevent further air from escaping. If this doesn’t work, your pump head is probably not attached well and you’ll need to re-attach the pump head more securely before trying again.
Last, check the pump head is secure on the valve and not at a strange angle. If it feels like no air is going inside the tire, your pump head may not be attached well.
In order to pump up a Schrader valve, place the pump head on the end of the valve and lock it in place (this is usually done with a switch and sometimes a screw).
For a Dunlop valve, place the pump head on the end of the valve and lock it in place to pump it.
The same method applies to Presta valves. However, you’ll have to unscrew the lock nut to the end of the valve before placing the pump onto the valve.
5. Pump Up the Bike Tires
Depending on your bike, you might want to pump anywhere from 25 PSI to over 130 PSI. If your bike pump doesn’t have a pressure gauge on it, you won’t be able to measure the PSI as you pump.
If this is the case, pump the tire up in increments.
One way to check the pressure is by squeezing the sides of the tire. It should feel firm and only press in a bit. This isn’t an accurate way to assess pressure but can help you prevent riding on a tire that is too low which might cause rim or tire damage.
Generally, mountain bike tires are 25 to 35 psi and road bike tires require 80 to 130 psi. (bicycling.com) You can pump up the tires on the low side to be safe and find out the correct pressure when you get home. When you finally ride on the correct bike tire pressure, your bike will handle better and you will be safer.
6. Recheck Tire Pressure
If you’ve given your bike a short ride and it feels fine, then your bike tire pressure is probably correct. Keep an eye on your tire pressure. If something feels off, try squeezing the sides of the tire firmly. Too much movement may mean it’s time to add some air.
A tire pressure gauge (Amazon Link) can come in handy for bike pumps that don’t have one and when you feel like your tire is getting low.
What Valve Type Do You Have?
Unfortunately, there isn’t a universal valve that’s used by every bike tire or inner tube, so depending on the type of valve your bike has, you might need a certain pump or adapter.
There are four main types of bike valves that we’ll quickly go over:
Schrader Valves
BohwaZ, FAL, via Wikimedia Commons
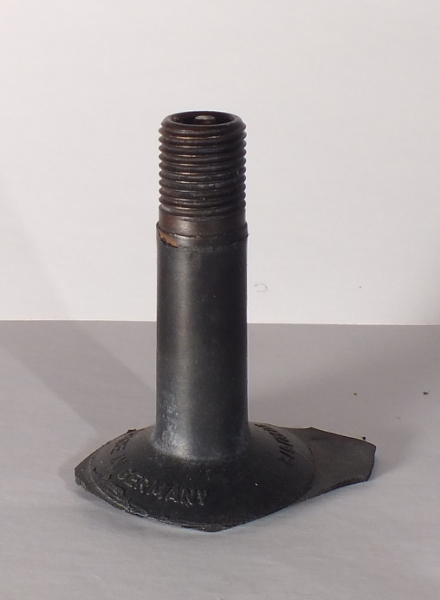
Schrader valves are the most common type of bike valve, especially on entry-level or beginner bikes. They’re also very common on mountain bikes and are even the same as the ones used in car tires.
The valve itself is essentially a hollow cylinder with a pin inside – once the pin is depressed, air can be pumped in or let out. Because of this simple design, inflating or deflating these tires can be very easy and efficient.
The dust cap on the valve (usually black plastic) helps prevent air from leaking out or dust and debris from getting in, which can prevent the valve from working correctly.
Presta Valves
BohwaZ, FAL, via Wikimedia Commons
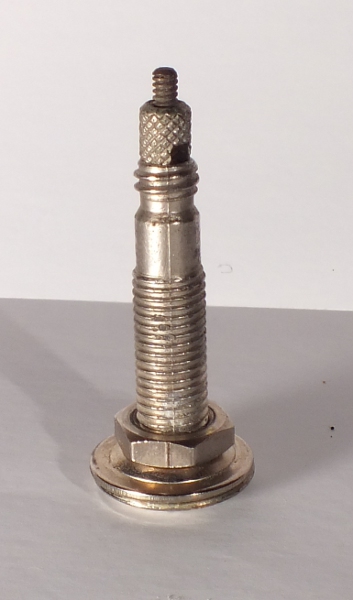
Unlike Schrader valves, Presta valves are only used on bicycles (usually road bikes). This is because they are narrower than Schrader valves and can, therefore, be used on road bikes without damaging the structural integrity of the wheel when making the hole for the valve.
In more recent times, however, Presta valves have started to be introduced on various other types of bikes, including hybrid bikes and mountain bikes. Whereas Schrader valves just need their pin pushed down to let air in and out, Presta valves use a type of nut that needs to be unscrewed in order to pump air in or let air out – this also protects from air leakage and debris.
The type of valve on the bike doesn’t necessarily make it better or worse at dealing with certain types of pressures but rather is best suited for narrower or wider wheels, as well as ease of use for the rider when pumping up their tires.
Because of the added components in their design, Presta valves are a little more prone to breaking or bending than Schrader valves, so it’s important to take a little more care when using them.
They also have a lock ring that keeps them in place against the wheel and keeps the valve straighter and more secure. Presta valves also use dust caps to keep them clean and act as a second barrier to air leakage.
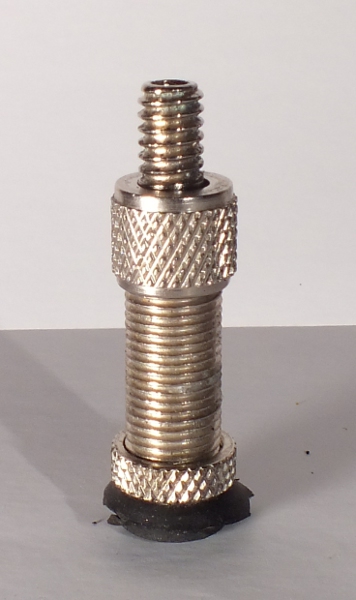
Dunlop Valves
BohwaZ, FAL, via Wikimedia Commons
Many people are unaware of this, but there’s actually another type of valve that’s known as a Dunlop valve or Woods valve. These are a sort of hybrid between Presta valves and Schrader valves.
Many experienced cyclists go years – or even their lifetime – without ever encountering them, so there’s no need to worry too much about them. It’s just an interesting thing to know!
Tubeless Valves
As tubeless tires don’t have inner tubes to attach their valves to, the valve is actually attached directly to the rim of the wheel.
Tubeless valves vary – some resemble Presta valves, whereas some have more of a likeness to Schrader valves.
Bike Pump Options
It’s important to get a bike pump that meets your circumstances whether that’s bike touring or going on a cruise around your neighborhood.
Here are six options to choose from. Be sure it fits your valve type and can work best for your needs.
Bike Pump Options
 AD AD
| Floor Pump DETAILS
|
 AD AD
| Foot Pump DETAILS
|
 AD AD
| Mini Bike Pump DETAILS
|
 AD AD
| CO2 Pump DETAILS
|
 AD AD
| ElectricPump DETAILS |
 AD AD
| Compressor Pump DETAILS
|
How Often Should You Pump Your Bike Tires?
With high-quality bikes and tires or inner tubes, you can often go months at a time without having to pump up your tires.
Having said that, this isn’t always the case. Most people recommend checking your tire pressure after every ride, just to make sure it’s secure and stable and you haven’t gotten a puncture.
If you start to take riding more seriously, consider picking up a pressure gauge or a pump with a pressure meter on it – this will give you a much more accurate reading of the tire pressure and take any guesswork out of the equation!
Inner tube vs. Tubeless Tires
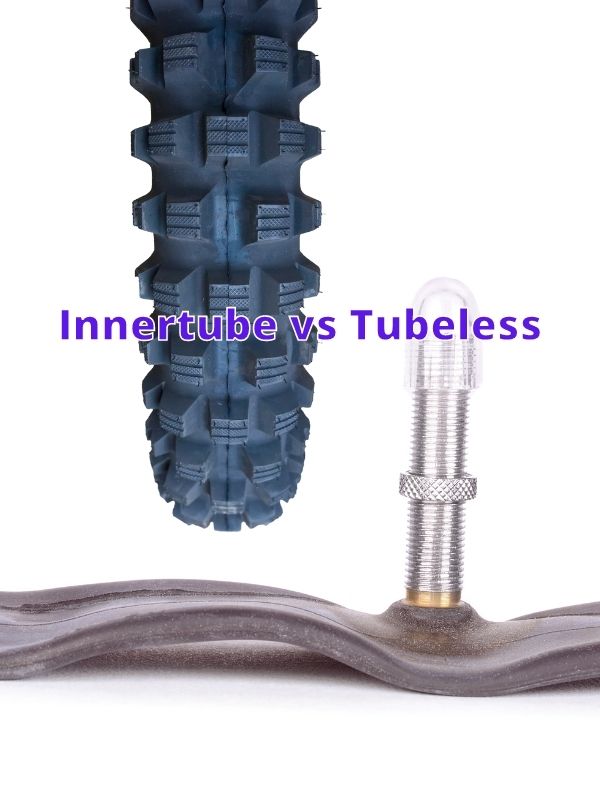
If you’ve never had a puncture before – whether that’s because you’ve rarely ridden a bike or simply because you’ve been one of those lucky few – then there’s a good chance you won’t know all the ins and outs of exactly how bike tires.
With most bikes, the tires themselves aren’t actually filled with air, but rather they have inner tubes placed inside them that are pumped up in order to fill the inner cavity of the tire itself.
When the inner tube is inflated, it pushes against the inner wall of the tire, giving it bulk and allowing it to grip the riding surface.
In more recent years, various manufacturers have released ‘tubeless’ tires. They work more like cars, where the actual cavity between the metal wheel and the tire is filled with air, and a special sealant seals any gaps to stop the air from escaping.
Although tubeless tires are a little bit harder to install and/or pump up, without an inner tube in the wheel, there’s no risk of ‘pinch flats.’ Not only this, but tubeless tires can also carry better due to the rotating motion of inner tubes vs. non-tubed wheels.
Currently, tubeless tires are mainly used for mountain bikes, as they can run at a lower PSI (pressure per square inch), meaning they offer more traction and grip. But they are also starting to be used on other bikes, such as road bikes or hybrid bikes.
What to Know About Tire Pressure?
Tire pressure is key to maintaining comfort and control on your cruiser bike. Bike tires come with a desired level of pressure – usually on the side of the tire wall – and this shows the PSI (pressure per square inch) that you should run your tires at.
There’s a little bit of give on either side, but being as close to that PSI number as possible is the safest and most efficient option when riding.
Running your tires under high pressure may mean less of your tire will be in contact with the road surface, meaning you’ll have less grip and may be more likely to fall off.
Not only this, but super-high pressure can put unnecessary stress on the tire itself, causing it to slowly come apart or even burst under a large, sudden impact.
Run your tires at a pressure that’s too low, and the air won’t absorb enough impact, meaning you’ll feel more bumps, and the wheel could actually get damaged as well. Riding over rocks or bumps could directly impact the wheel and cause it to crack or snap.
Not only this, but low pressure also makes you more likely to get a puncture, as well as the tire coming off altogether, as there won’t be enough pressure to hold it in place.
All in all, when it comes to tire pressure, it’s important to strike a balance that’s both effective for performance but also safe to ride on too. But remember, the number on the side of the tire is usually the safest option.
Final Thoughts
How to pump bike tires isn’t the most complicated or detailed process, but for safety, comfort, and efficiency, it’s important to get this right.
The same way driving on a flat car tire is both dangerous and can damage the car; the same applies to your bike. With different types of bikes, tires, and valves, it’s important that your pump and bike are compatible with each other, or they’re likely to not work properly.
And if you don’t mind forking out the extra cash, it’s good to invest in a pump with a pressure gauge just to give you a more accurate reading of the PSI. Now that you’ve got the know-how – get out there and start riding.
Thanks for Visiting Helpshoe.com

