![Shoelace Alternatives [Hacks That Work]](https://helpshoe.com/wp-content/uploads/2022/02/Shoelace-Alternatives-Hacks-That-Work.jpg)
I am always intrigued to find different ways to turn my regular shoes into something fun. Sometimes, I think I can make them better using my DIY skills. This time I was looking for some shoelace alternatives that I could replace with my regular ones.
You can use hair bands, zip ties, and various ribbon laces as shoelace alternatives to change up your shoelaces in unexpected ways. Well! I compiled a list of my favorite shoelace alternative hacks from different crafters online, and here it is:
- Ribbon Shoelaces
- Elastic Tie-Free Shoelaces
- Fabric Shoelaces
- Hair Tie Shoe Laces
- Paracord Shoelaces
Although there are tons of cool printed shoelaces out there that you can buy, however, if you’re creative like me and wish to save some money, then keep on reading.
Ribbon Shoelaces
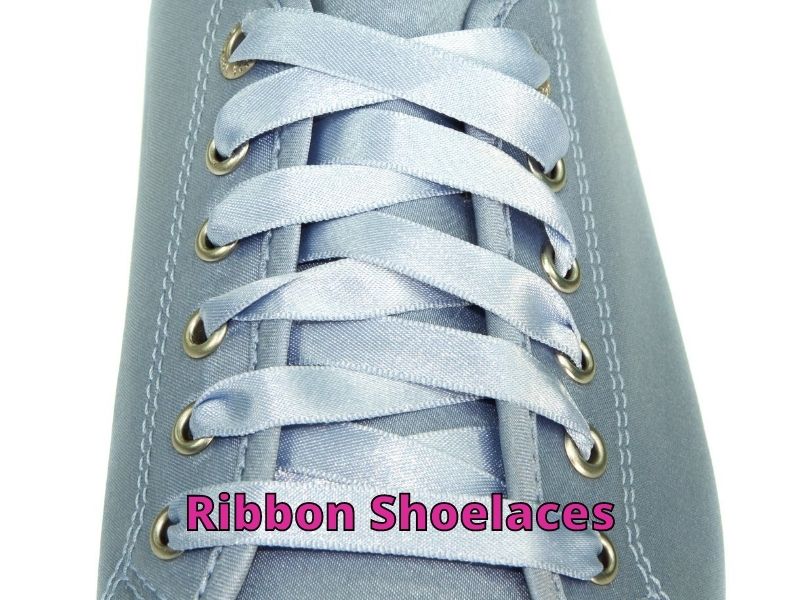
1. Silk Ribbon Shoelaces
You can use ribbon shoelaces to enhance your dressy shoes, which might not look as good with regular shoelaces. Well, it might be a good idea to use silk ribbon laces instead of regular shoelaces to compliment your shoes.
2. Chiffon Ribbon Shoelaces
If you want something more delicate than silk ribbon shoelaces on your favorite dress shoes, you can try chiffon ribbon laces. These laces will make your shoes look more elegant.
3. Velvet Ribbon Shoelaces
If you are skeptical about using silk or chiffon shoelaces because they are so delicate to tie or slippery that they may keep untying themselves. Consider using a material that has some texture, such as velvet ribbon.
4. Cartoon Ribbon Shoelaces
If your children love your ribbon laces and wish to use the same for their shoes, you can try cartoon ribbon laces. This hack will make their favorite shoes even more special.
Here are the steps to follow:
Things you need:
- A pair of shoes
- Ribbon (silk, chiffon, velvet, cartoon)
- Scissors
- Clear tape
Step 1
- If you don’t want to spend extra on the ribbon, you can measure your laces and buy ribbons according to them. But don’t be too precise since a little more is better than less.
- Remove the lace from one of your shoes, place it straight on a flat surface and measure the ribbon with the lace’s length.
- Cut the ribbon in the same size twice. You will now have two equal-sized ribbon strands.
- I would suggest cutting a few inches longer than the original laces so that you have some extra length if you mess up.
Step 2
- Now it’s time to make aglet using clear tape.
- Put a piece of clear tape on the table.
- Place one end of the ribbon over the tape’s edge. Make sure to place it a little above the tape’s height.
- Press the ribbon firmly to the tape.
Step 3
- Fold the ribbon in half, then in half again, and repeat. You can do it 4-5 times or more depending on the thickness of your ribbon.
- Roll and twist the ribbon tightly in the tape while keeping the tape straight as much as you can.
- Rolling it tightly will make it last longer and look better. Also, you might find it easier to tuck it with your fingernail as you go.
Step 4
- Cut off the excess tape.
- Repeat steps two and three with the other piece of ribbon to make a pair of shoelaces.
- Trim the ribbon if there are any loose threads or the tape if the end is crooked.
- Lace your shoes with these super cool ribbon shoelaces.
Elastic Tie-Free Shoelaces
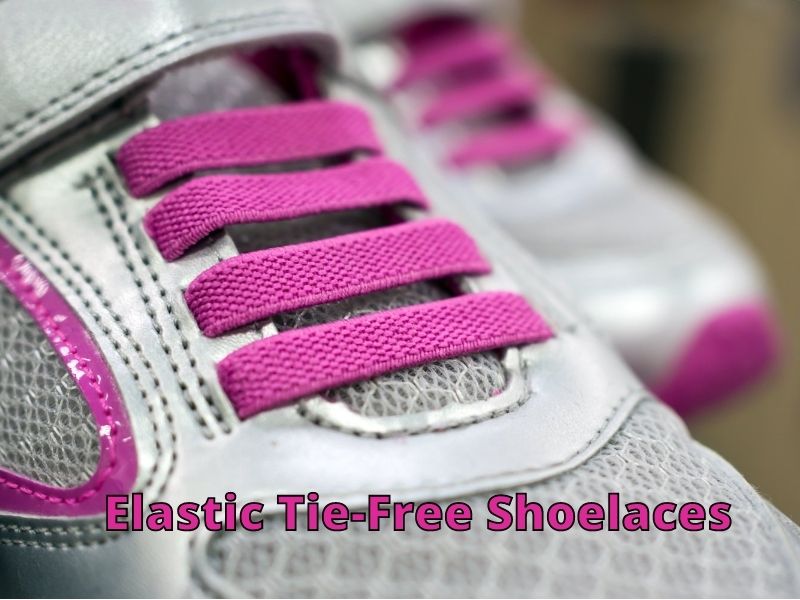
Have you ever thought tying your shoelaces is a complete hassle? Or maybe you’re bored of bending down every 10 minutes to tie your shoes? Or You tie your kid’s laces because they are too small to do it. This hack or the shoelace alternative is the one that will ease your problem.
All you need to do is replace those regular shoelaces with elastic bands to have comfortable slip-on shoes. It is handy for your everyday shoes.
Here is how you can do it:
Things You Need
- A pair of shoes
- Needle
- Thread
- Scissors
- Elastic band
Step 1
- First, remove the lace from one of your shoes (say right) and use the other to help with the pattern.
- Cut a 1/4-inch strip elastic band about the same size as the shoelace using the right shoelace.
- Insert the elastic band strip into the bottom holes.
- Make sure to lengthen the elastic lace evenly on both sides.
Step 2
- Now using the left shoe’s lace pattern, lace the elastic band.
- You can change the pattern or keep it the same one however you like. But I would recommend following the same pattern to avoid any confusion.
Step 3
- Once you are done lacing your shoe, make a cross with the ends.
- Try on your shoe to determine how tight you want it to be. You can now mark the cross where you feel the snug is comfortable.
- Make sure to mark carefully because this is where you will sew the cross.
- You can secure the cross firmly by making loops with the needle in and out of it.
- Knot the thread together and trim the extra string.
Step 4
- Make a knot with the elastic band over the thread work to lock in your shoe fit and trim the excess elastic banding.
As this elastic band keeps pulling the shoe together, you will feel as if you just tied your shoe. These elastic band strips will replace your regular shoelaces, making it so much easier to put these shoes on.
Fabric Shoelaces
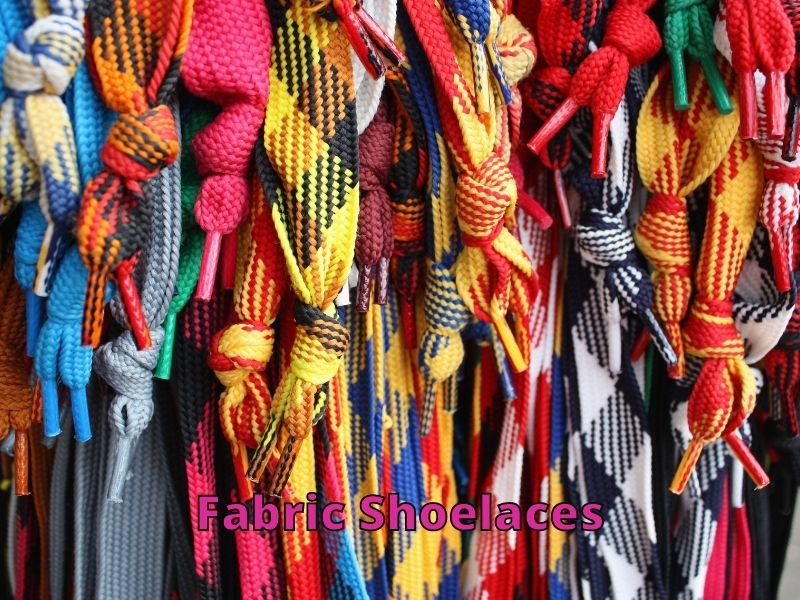
If you want laces that are a little thicker but still look as fun as ribbon lace, you might want to try fabric laces.
Fabric shoelaces are simple to make and add a personal touch to your shoes. You can add a fun pop of color to your shoes with them, right? So, replace those boring shoelaces with your favorite fabric!
Here is the method to sew and get the right shape of fabric shoelaces:
Things you need:
- A pair of shoes
- The fabric of your choice
- Two needles
- A thread that matches or contrast fabric
- Sewing machine
- Metal tips
- Pliers
Step 1
- The first step is to measure your shoelaces’ length. To do this, measure the old ones you want to replace.
- Cut two 1.5-inch-wide fabric strips of the same length.
- Place the fabric strip over the ironing board.
- Fold the fabric strip lengthwise from both ends.
- Using a 1/8″ seam, stitch the long edge.
- Don’t forget to backstitch at both the top and the end.
- Near one end of the stitching line, pin a safety pin.
- Put the pin’s top inside the tube and push it through.
- Push through until it comes out from the other side, sliding the fabric gently as you go.
- Pull the safety pin out until the entire tube is upright.
- After folding it over, iron it flat.
- With this double fold, you’ll get a strip that’s 1/4 the width of the original.
Step 2
- Stitching itself is really easy.
- Make sure your machine is set to zigzag stitch mode.
- Stitch along the edges.
- Afterward, fold the tips again and stitch flat.
- Your laces are now ready, but you may thread them through as well.
Step 3
- To make the tips extra firm, you can use the metal aglets. But it’s completely optional because the laces work just fine without them.
- Insert the lace tips into the metal clamp.
- Press them in really tight with your fingernails or scissors or tighten the clamp with pliers.
- Lace the fabric laces through the holes of your shoes.
Hair Tie Shoe Laces
Yes, you heard it right! You can use elastic hair ties to replace shoelaces. However, this will only work for your baby’s shoes.
Here are a few steps you need to follow:
Things you need:
- A pair of shoes
- Elastic hair tie with decorative flowers
Steps to follow:
- The first thing you need to do is fold the hair tie in half.
- After folding, push it through one of the shoe’s eyelets. Now pull the folded end of the hair tie from the other hole. This will create a loop.
- You can now open the loop wide by putting your index finger and thumb through the loop on the point that you pulled through the eyelets.
- Loop it around the flower to secure it in place.
- You will need to add more hair ties if your shoes have more eyelets.
- Once you attach the ties, your child will be able to get their foot into the shoes.
- Just stretch the elastic to let them wear shoes without untying the knot every time.
Paracord Shoelaces
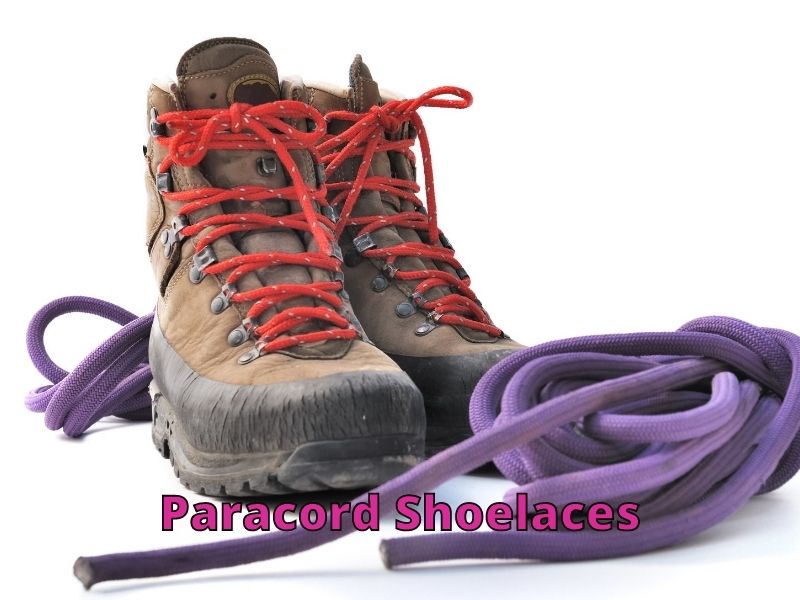
You may not believe it, but paracord can be an excellent alternative for regular shoelaces. The best part is you can find it in so many different colors at any craft store.
The following steps will guide you in making paracord shoelaces:
Things you need:
- A pair of shoes
- Paracord (same size as your shoelaces)
- Scissors
- Lighter
Step 1
- First, you need to measure the paracord so that it matches the length of your shoelaces.
- Remove one of your shoelaces and straighten the shoelace as much as you can.
- Place the paracord next to the shoelace in such a way that one end of the cord is adjacent to one end of the shoelace.
- Extend the paracord from the other side.
- The length of the shoelace and the cord needs to be the same, so cut the cord at the end of the shoelace.
Step 2
- You need to be a bit careful in this step since it involves a lighter.
- First, you need to fuse the paracord, so it is easier to work with and serves as aglets.
- You can do this by holding the end of the paracord over a lighter and lighting it up.
- Let the inner cords melt. Don’t worry if there’s a little flame; it will probably blow out on its own
Step 3
- Now using paracord, you can lace up your shoes in any pattern that you prefer, or you can follow the pattern that your regular shoelaces have.
- You will notice that fusing the ends of the paracord will make it much easier to go through holes.
- Once you have finished lacing your shoe, put your foot inside to see how it feels.
- You may feel it differently, but don’t worry, you’ll get used to it.
Take Away
Now you are ready to up your shoe game with these shoelace alternatives. These shoelace alternative hacks are also helpful for your kids that are too young to tie their shoes. Besides, these hacks can make your favorite shoe, or your kid’s even more special.
Thanks for visiting helpshoe.com
References