When you think about it, the seat is a pretty important part of the bike. It’s not just the place where you temporarily park your behind when zipping around the neighborhood or while participating in your local triathlon. It can also be your very own confessional seat or office chair.
All jokes aside, it’s important to make sure that your bike seat is properly attached to its post so that no unexpected “accidents” happen while riding your bike.
Read on for a short and helpful guide on how to attach a bike seat to a post.
How to Attach a Bike Seat to a Post
When you’re getting ready to replace, repair, or reposition your bike seat, you’ll need to be sure to be aware of several steps that are needed to help you get it right.
The following video can give you some basic tips on how to replace your seat. You can see the steps I took by looking at the pictures I took of my seat removal and replacement as well.
For a picture guide of all the steps I took on my bike and what procedures I used take a look at the following steps:
1. Put Your Bicycle on a Bike Stand

Use the bike’s kickstand or a stand to help the bike stay stable. A bike repair stand can be helpful to bring the bike up your level so working on it is easier.
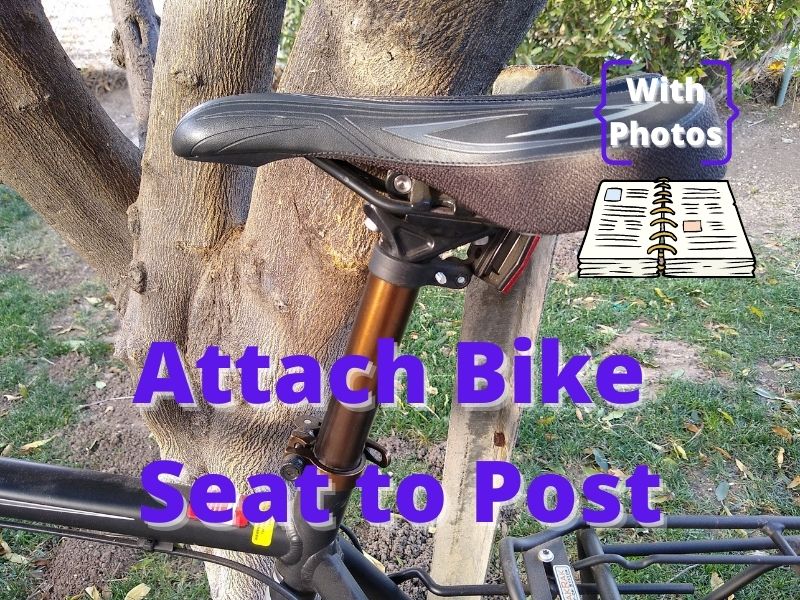
For me, I decided to lean my bike against a tree and work on the bike saddle and post separately. The advantage is that I could manipulate the pieces easier and see how everything fits together very clearly.
There are disadvantages to taking a seat and post off of the bike. One is that the post is not stable, making it more difficult to stabilize all the parts while loosening and tightening the bolt. The other disadvantage is you can’t reference what the seat looks like in relation to the bike.
2. Find the Bike Seat Clamp

Various bikes have different clamps that help secure the seat. Look under the seat to find how your seat is attached to the post.
Most higher prices modern bikes will use a clamp that has one or more bolts that hold the seat in place.
A traditional/standard seat clamp will fit over the end of the seat post and tighten with a nut and bolt. The seat post is already attached with more modern seats, but for a traditional one, the clamp fits over the end of the seat post.
The clamp will secure the seat to the post by either clamping down on the two rails or the rails and seat post.
Newer bike models will likely use a 4-6mm Allen wrench or 9/64-1/4 SEA sized wrenches, depending on the type of units that are shown on your Allen wrenches (also called hex keys).

So when you find out what type of clamp you have then you’ll know you need either an Allen wrench for more modern style seat posts or a couple of regular wrenches for a traditional seat.

If you like the way your seat position is to make a note of where on the rails the clamp is positioned and where on the seat post the clamp is tightened.
You can take photos or an easy way is to mark the exact position of each part with some tape.
If you’ll be removing the seat post and seat from your bike, mark the area to ensure you place the post at the correct height. I used a crayon but you can use tape or a non-permanent marker.
Then mark where on the seat post your traditional seat is positioned and where on the rails the clamp is positioned.
3. Loosen the Bike Seat Clamp Screws

Now you can start to loosen the bolts or bolt and nut on your seat clamp. Mine used a 5/16 SEA or a 5mm Allen wrench.
You’ll need to loosen it, but you don’t need to unscrew the bolt(s) all the way. Loosen the bolt(s) until the clamp allows the rails to pass through.

Depending on your seat type you can now take off the seat by passing the rails through the clamp on each side (such as on my bike) or lift the seat off the post (such as on a traditional seat).
After you have taken the old seat off the post you can place it to the side for a more modern seat, but for a traditional/standard seat, you may need to loosen the clamp more to ensure the rails can pass through the clamp.
Your new bike seat/saddle may come with a new clamp, so taking the seat off the old clamp may not be necessary.
4. Get the Right Bike Seat

If your seat is old or doesn’t support you well, it’s time to get a new seat. New seats will usually fit onto the clamp you already have.
If it’s a traditional seat clamp won’t fit onto your newer bike post. You may be able to remove the clamp on the traditional seat so it can fit on your newer clamp style.
Remember to get a traditional seat for a traditional seat post and a newer seat for a newer seat post; the kind that has the clamp pre-attached.
If you get a seat that doesn’t match your post you will need to return it, make adjustments, or buy a new seat post.
5. Make Sure All Components Are There

Now you’re ready to install your new bike seat.
- First, check it to make sure all the parts that go on the seat post are in place before attaching the seat.
- Second, the screws need to be prepped. If you ride a lot, then your seat may start to loosen. Use removable Loctite (Amazon.com) if you want to prevent movement.
- Third, mark the new saddle so it sits in about the same place as your previous saddle.
")
- Fourth, the seat/saddle rails need to be placed correctly. Place the rails into semi-circle divots on either side of the clamp and align the clamp pivot point.

Each bike clamp is slightly different, but the same general idea. Align the rails and adjust the seat so it is level. Leave the clamp a little loose so you can make any needed adjustments before completely tightening.
6. Tighten the Saddle Clamp

- First, check the rails are actually aligned and seat pivot is centered correctly. Align the parts if needed.
- Second, check the seat angle. If you have two screws like my bike tightening them both about the same amount helps level the seat. (Tightening the front or back bolt more than the other will allow the seat to pivot up and down. )
- Third, slide the rails to the position that matches your old seat position, if that position was comfortable. If it seems right start to tighten the bolts.
- Last, don’t over-tighten the bolts. Tighten until firm and if you’re using Loctite, wait 24 hours to ensure full curing. (If you have a torque wrench you may be able to find the specific torque for your bike from a bike shop, but be careful if guessing because bolt torque requirements vary greatly.)
If you look at the saddle sideways, it should lie mostly level. Try wiggling the seat up and down a bit and see if it moves at all. There shouldn’t be any wiggling.
If you’re not quite sure if your seat is well-positioned at this angle, you can always test it out and adjust it as needed.
7. Test the Seat

Test the seat to make sure it’s angled right and is far enough forward or back. Adjust if needed.
You can adjust it for a while, but remember when using Loctite that it dries in about 20 minutes and cure in about 24 hours.
However, if it isn’t, you can always adjust it later.
8. Secure the Screws Again

Secure the bolt tightly one more time if needed. If you’re using a dual screw clamp, tighten or loosen the bolts to adjust the angle.
Tighten them firmly, but not with too much torque. If using Loctite, this should help the screws stay in place.
Several days later, if you need to adjust the screws again, decide if you want to use Loctite again because once the screws are loosened, the Loctite no longer holds them securely anymore.
Install the Bike Seatpost

A lot of cyclists like their bikes lighter. This helps them with long-distance rides and when carrying your bike is needed. Considering trading your heavier bike parts for lighter ones is helpful, and this includes your seat post.
Whether you are placing your seat post back after installing your seat or replacing your post altogether, it can be fairly easy, but sometimes extra steps will be needed for various seat posts.
1. Measure the Seatpost
Before you remove the seat post, mark where the seat post meets the bike frame. Then get out a tape measure because later you’ll need a tape measure to figure out the overall height of the post.
2. Loosen the Post Clamp
Get an Allen wrench and use it to loosen the clamp bolt or simply pull the quick-release clamp lever. Make sure it’s loose enough for you to easily remove the post.
3. Remove the Seatpost
Once you’ve removed the seat post, look for its size number. It should be on the seat post itself. If it’s not visible, use calipers or a tape measure to find the seat post diameter and write it down so you don’t forget it.
“Seatpost diameters generally range from 22 mm to 35 mm in 0.2 mm increments. The most common size is 27.2 mm (1.07 in) for most bikes.” (wikipedia.org)
You should also measure the length of the post with your tape measure to see how long it is.
With these measurements, you should be able to find a compatible seat post for your bike.
4. Make Sure the Seatpost Fits
Now you’ll need to mark the new seat post at the same length as the old seat post, so they’re both the same length above the bike frame when inserted.
Make sure the new seat post is of the same size as the old one so that it’ll fit like a glove in the bike seat tube.
If you’re lucky enough to have a carbon fiber seat post, you’ll need a special paste to attach the seat post and keep it in place. That way, there will be less tightening required.
Apply the paste on both sides of the seat post and on the inner part of the seat tube before moving it smoothly into the tube.
The post should go right at the insertion mark, which is different for each post.
5. Adjust the Seatpost
The seat should remain loose until you’re sure that you have the right height measurement. Some bikes come with a quick-release post clamp which means you may need to tighten or loosen it just a bit when attaching your new post to get the pressure just right.
Should you feel the need to adjust your seat post, the quick release system will make that easier for you without requiring the use of an Allen wrench.
6. Attach the Saddle onto the Seatpost
If you haven’t done so already, attach your saddle securely onto the seat post. Make sure the clamp you have will fit your seat.
7. Position the Saddle
Stand behind the bike if needed to align the seat so it is parallel to the bike frame. Position the saddle straight forward before you tighten it.
8. Getting a New Seatpost
If your getting a lighter seat post to match all of your other lighter bike components, the good news is that most lightweight bike posts are nice and sleek with a visually appealing appearance.
You may also decide to opt for a high-end seat post. Just make sure to measure your old seat post before getting a new one.
Final Thoughts
Attaching a bike seat shouldn’t be too hard, but every circumstance is a bit different. All you usually need is an Allen wrench. With a little time and remember to follow the procedure, you’ll be set for your next bike ride.
Next time you go for a bike ride, with a well-adjusted seat, hopefully, you’ll have a fun time enjoying your time outside.
Thanks for visiting Helpshoe.com
References:
https://www.thebiketube.com/tutorials/how-install-bike-seat-3-different-seat-posts
https://www.modernbike.com/how-to-install-a-standard-seat-clamp